QuickStart Instructions for PASSPORT WEB TO HOST on IBM WebSphere Application Server
Background Information
IBM WebSphere Application Server started life as a “servlet express” in 1998 and since then IBM have shipped several
versions and editions for the different operating systems and platforms. IBM WebSphere Application Server V5 was a major rewrite
of the previous versions code base and was the first time that it was coded from a common code base, so IBM WebSphere Application Server
across all deployment platforms, from Intel x86 to the mainframe now uses substantially the same code. This coupled with the
singularly familiar and easy to use Administration console should mean that these instructions are valid for installing PASSPORT WEB TO HOST
on to IBM WebSphere Application Server on ANY platform.
Also, with WAS V5 and later, applications are installed using the administrative console or the “wsadmin” scripting interface.
The WebSphere administrative console is the graphical, web-based tool that you use to configure and manage an entire WebSphere cell.
It supports the full range of product administrative activities, such as creating and managing resources, applications, viewing product
messages, and so on.
This document provides instructions on how to install PASSPORT Web to Host on a Windows server running IBM WebSphere Application Server 8.5.
PASSPORT WEB TO HOST EAR file
PASSPORT WEB TO HOST is packaged as an Enterprise Application Archive file (EAR) file and it is designed to run out of an expanded directory
structure. An EAR is a zipped file so the contents can be expanded using a product such as WinZip. Our EAR file includes a
Web Archive (WAR) file that contains all the PASSPORT installation files so if you prefer to work directly with the WAR file, you
may do so. Different application servers have different functionality with regard to deployment and expanded directory structure as
discussed below:
- Deploy compressed archive to working directory- On some application servers (such as IBM WebSphere V5 and higher), the
deployment process expands the EAR/WAR file automatically into a working directory and from that point forward, the expanded
directory is considered to be the application. For these application servers, you deploy the compressed EAR/WAR file and work in
the resulting directory structure. The instruction below discusses this deployment method.
- Deploy expanded archive as working directory- On other application servers (such as BEA WebLogic), the deployment process
expands the EAR/WAR file into a temporary directory and (conceptually), the compressed EAR/WAR file is still considered to be the
application. For these application servers, you must expand the EAR/WAR file manually and then deploy the expanded directory structure,
which becomes your working directory. For more information, please refer to
QuickStart Instructions for PASSPORT WEB TO HOST on BEA WebLogic Application Server.
1. Check your system requirements
Before installing PASSPORT WEB TO HOST, make sure that your web server meets the following system requirements. If these requirements
are not met, you may have unpredictable results.
- TCP/IP connection to the host
- Web server such as HTTP server
- IBM WebSphere Application Server
2. Starting the IBM WebSphere administrative console on the server
The way you access the administrative console is the same whether you have a standalone server environment or a distributed
server environment. Instructions below are for a standalone server environment.
- To access the administrative console, make sure that application server, server1, is running by using this command:
Windows: <profile_home>\bin\serverStatus -all
UNIX: <profile_home>/bin/serverStatus.sh –all
- If the status of server1 is not STARTED, start it with the following command:
On Windows: <profile_home>\bin\startServer server1 (or from Program Group)
On UNIX: <profile_home>/bin/startServer.sh server1
Note: <profile_home> default on Windows would be C:\Program files\IBM\WebSphere\AppServer1 \ (for IBM WAS V.6.1)
<profile_home> default on Windows would be
C:\Program files\IBM\WebSphere\AppServer\ (for IBM WAS V.7.0 and higher)
- Open a Web browser to the URL of the administrative console. The default port is 9060 for HTTP and 9043 for HTTPS.
This port can vary, depending on the ports you specified when you created the application server profile.
http://<hostname>:9060/ibm/console
https://<hostname>:9043/ibm/console
Note: <hostname> is your host name or IP address for the machine running the application server.
The administrative console loads and you are asked to log in. Once the server is started and you are signed in you can proceed
with the installation of PASSPORT WEB TO HOST.
3. Installing PASSPORT WEB TO HOST
Note: If you are upgrading to a newer version, it is very important to follow
these instructions to preserve your PASSPORT configuration files.
- From the menu on the left, select Application → New Application → New Enterprise Application.
- Specify the location of the “passweb.ear” file to install.
Note: the EAR file can either be on the web application server (Remote file system) or on any accessible
location by the administrative console (Local file system). The screen shot below is using Local file system path to access the EAR file.

- Click Next
- Select How do you want to install the application?
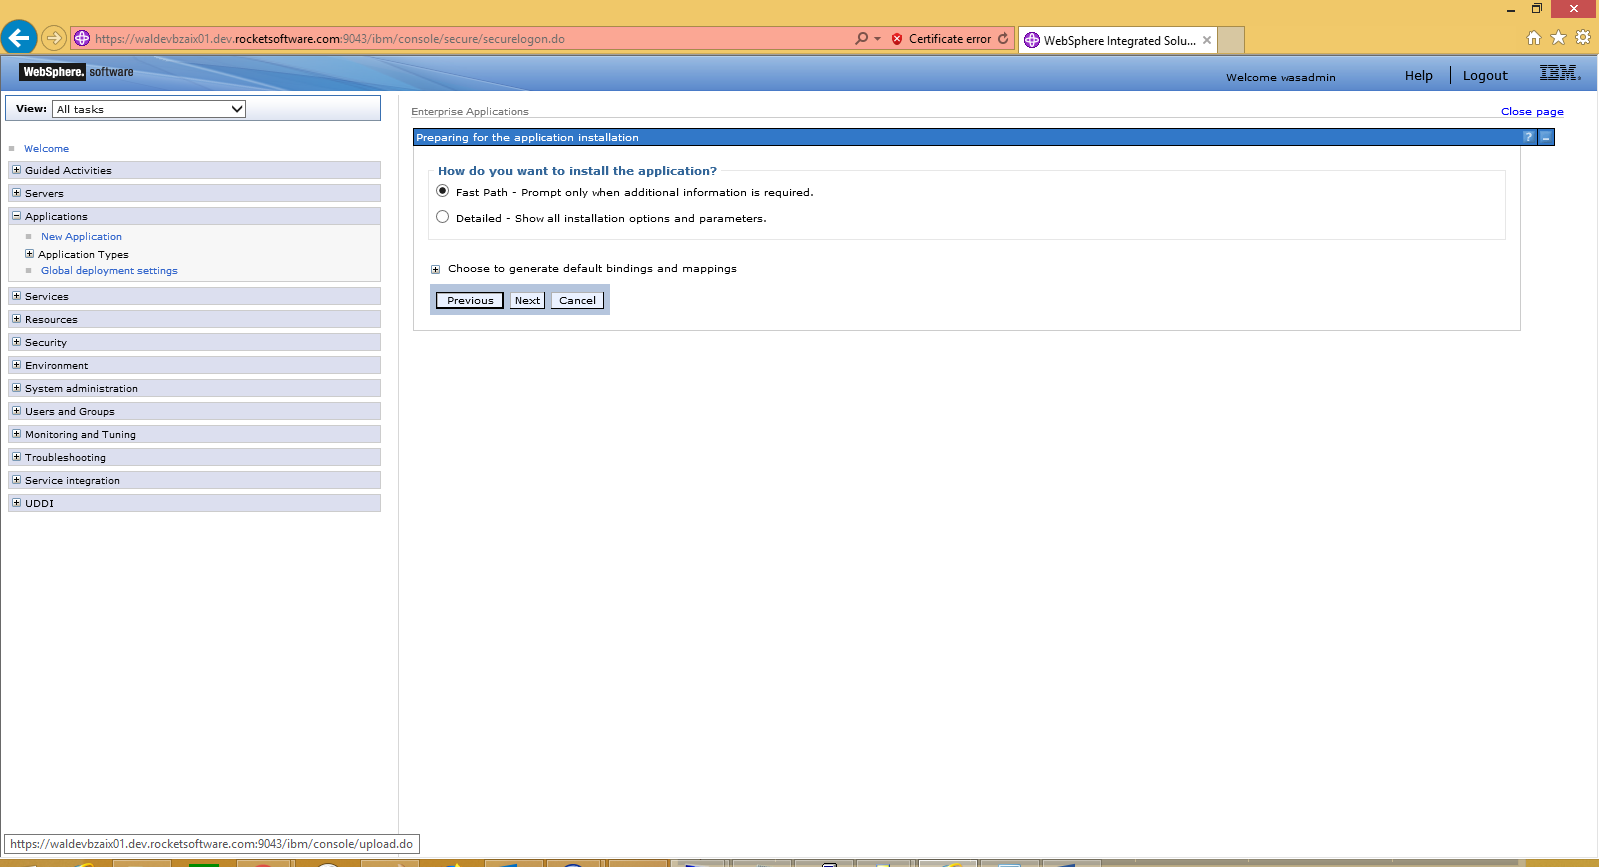
- Click Next.
- The 1st step of the installation allows you to set the installation options. These settings like application name, file permission,
etc., primarily determine whether default settings will be used (as in our sample) or if you will override them during the installation.
On this screen you can change the application name from the default “passweb” to anything you like. In our example, we used “PASSPORT”.

- Click Next.
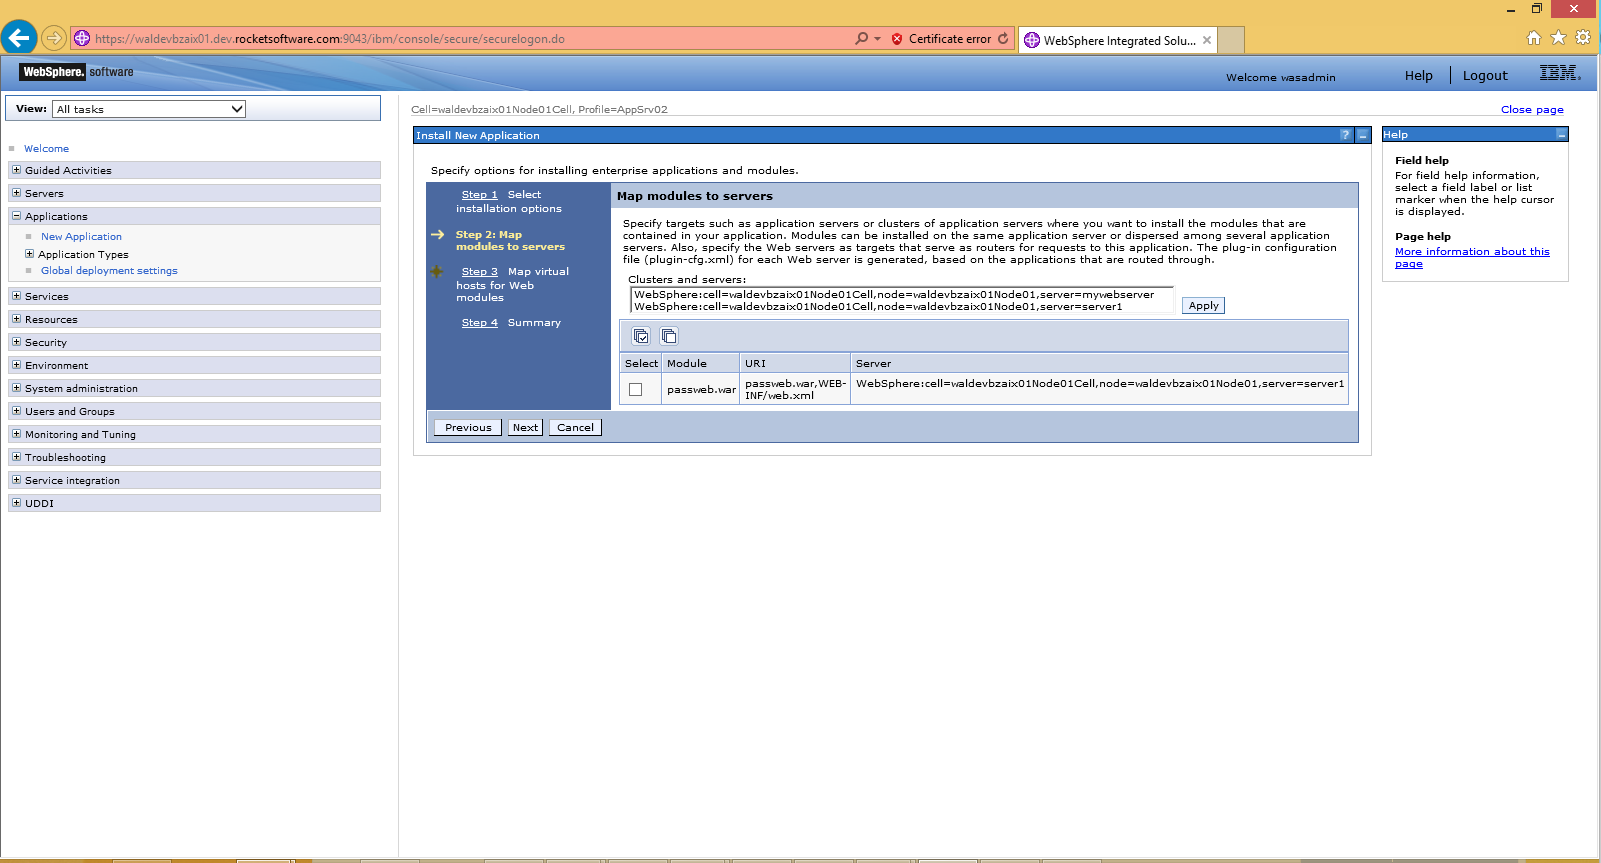
- Step 2 & 3 allows you to map modules to application servers and web servers. We used the defaults for our installation.
- Click Next.
Note: The Context Root name is the name being used in the URL to launch PASSPORT WEB TO HOST.
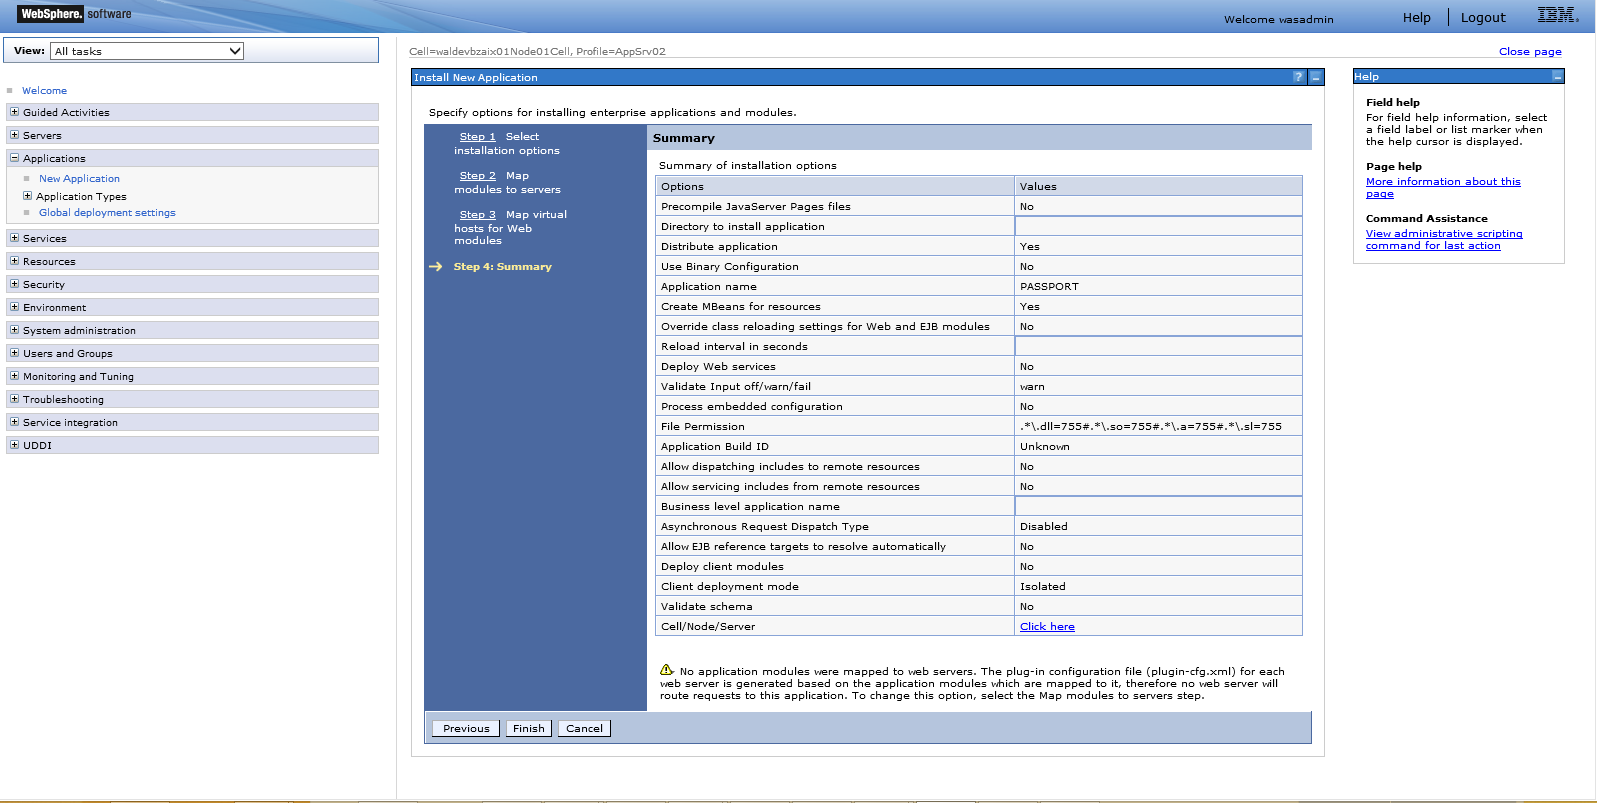
- Step 4 displays a summary of the installation options selected. See below.
- Click Finish to install the application. The screen below appears during the installation. Watch out for any error messages.
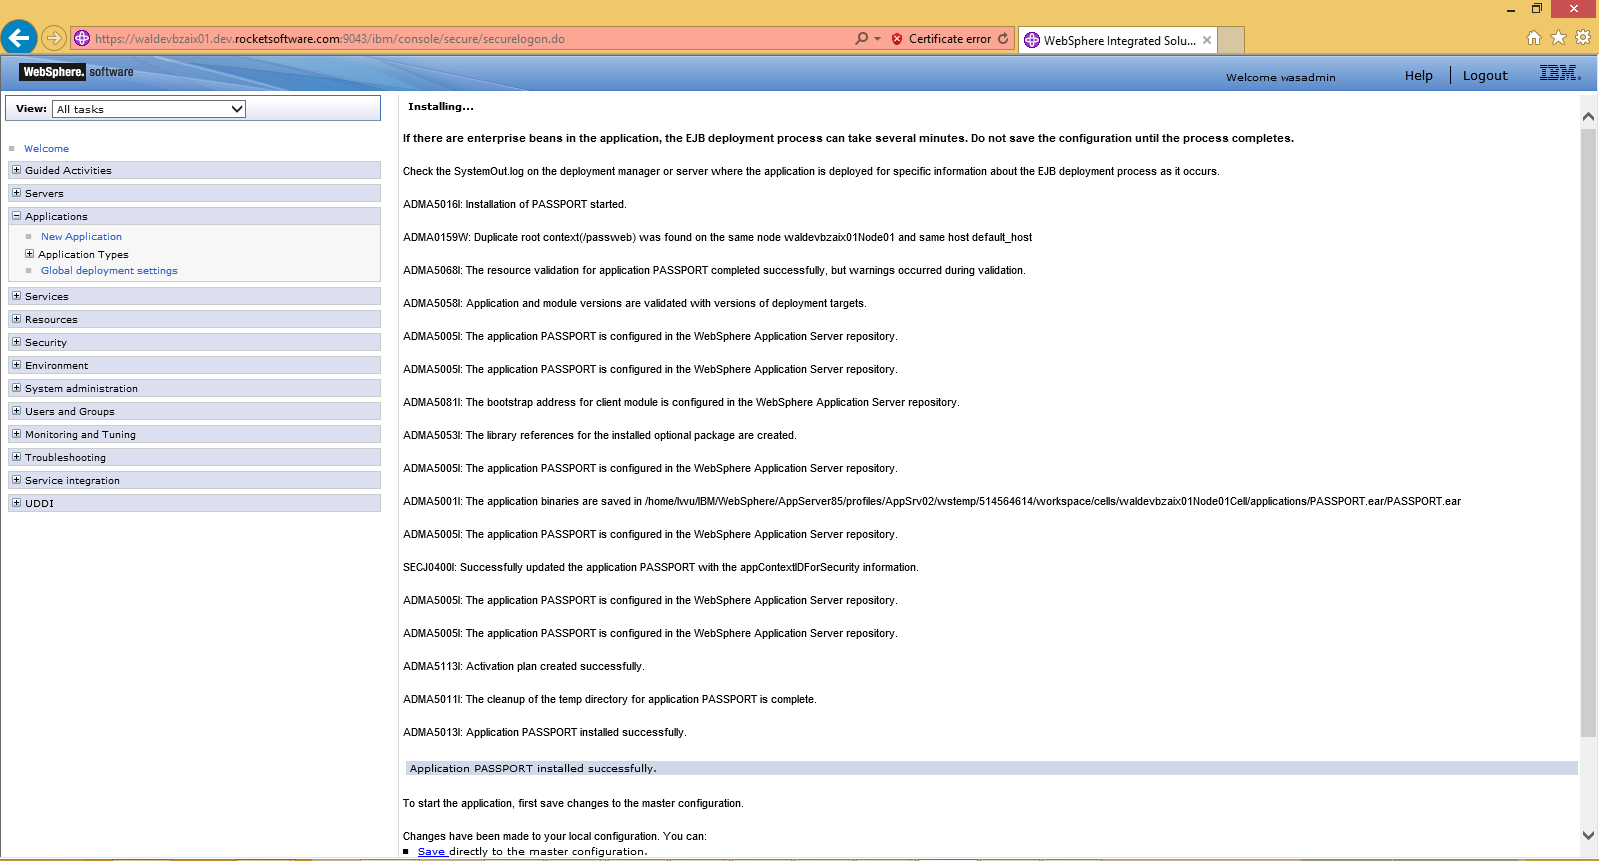
- Review the installation messages and click Save to save the configuration.
4. Starting PASSPORT WEB TO HOST on IBM WebSphere
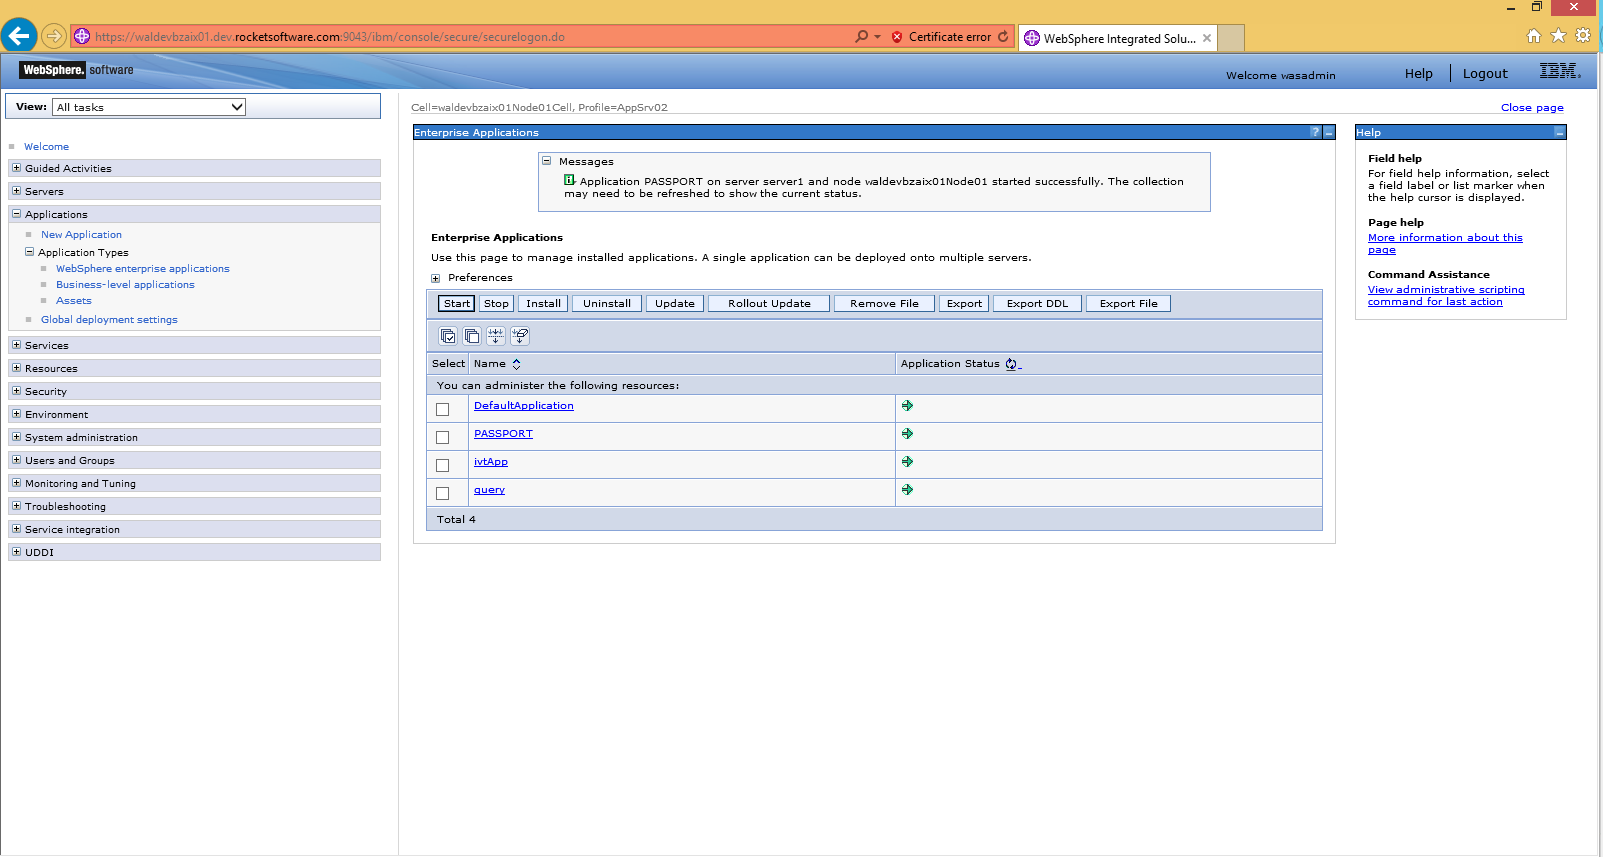
- Once the application is installed we need to start it. Go back to Applications → WebSphere Enterprise Applications and
select “PASSPORT” and click the Start button. See below.
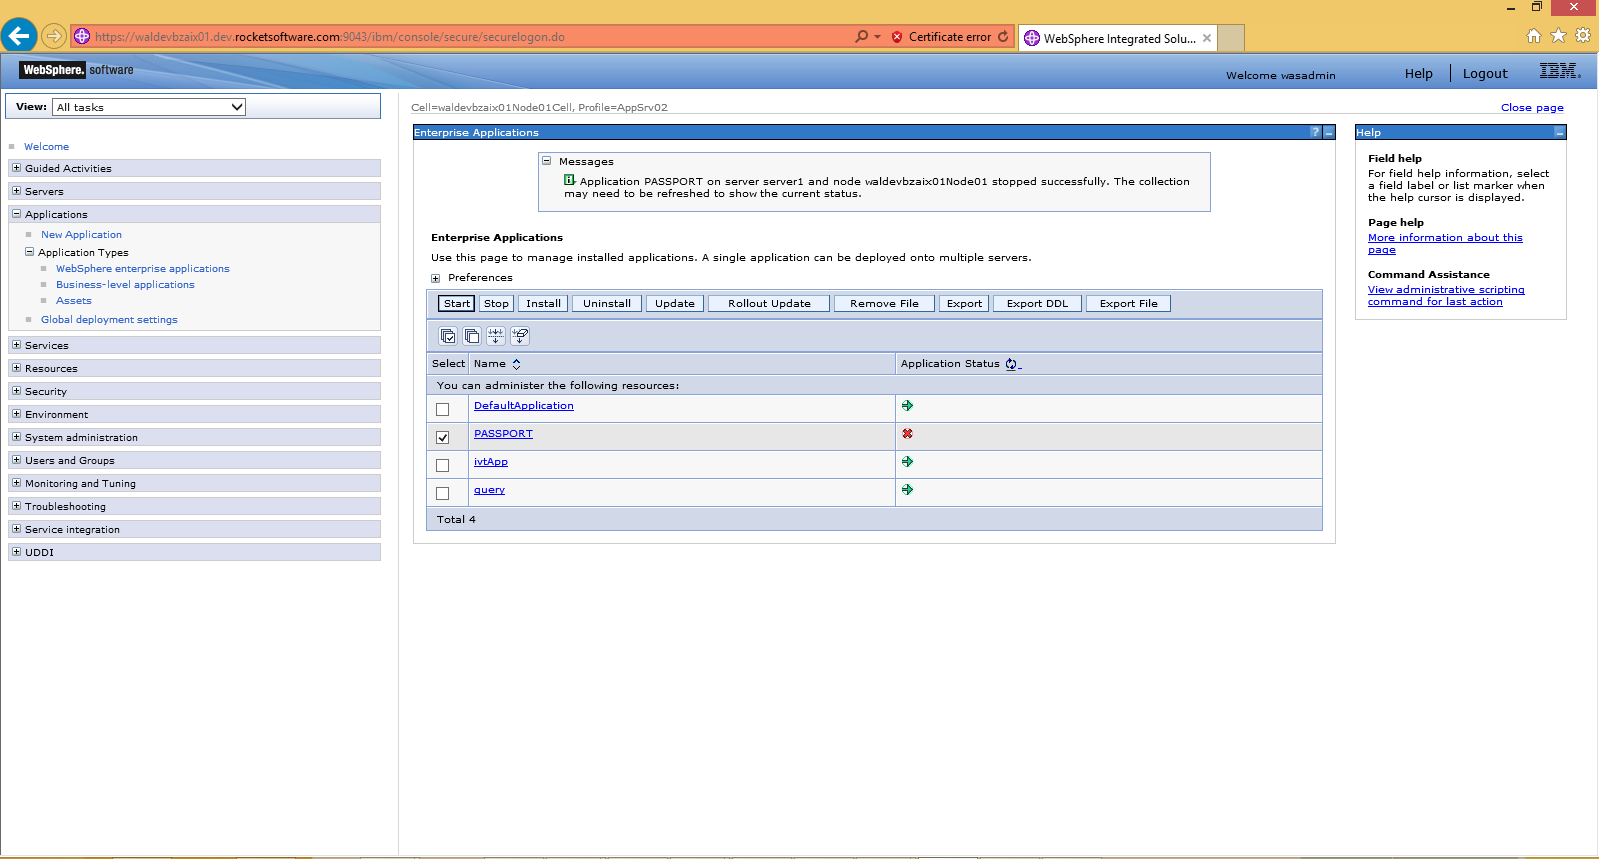
- If all works, the following screen is displayed. Else an error message is displayed and this will need to be resolved
before using PASSPORT WEB TO HOST.
5. Starting the PASSPORT WEB TO HOST Administrator website
- PASSPORT WEB TO HOST administrator can be launched from any workstation PC with IE by using this (default)
URL http://<servername>:9080/passweb/Index.htm
Note: <servername> is the name or IP address of the installed location of IBM WAS. This URL is
case sensitive (use a capital I for Index)
- This starts the PASSPORT WEB TO HOST administrator page. There are four sections: Configure, Deploy, Support, and Documentation.
Each section provides pertinent information to help you quickly complete the installation and configuration.
- If you receive an Invalid License Code error the first time launching the PASSPORT WEB TO HOST Administrator program, please
request a new code from passport.sales@rocketsoftware.com.
Once you have a valid license code, simply choose the Purchase button from the splash screen, type or paste
the code then click OK.

